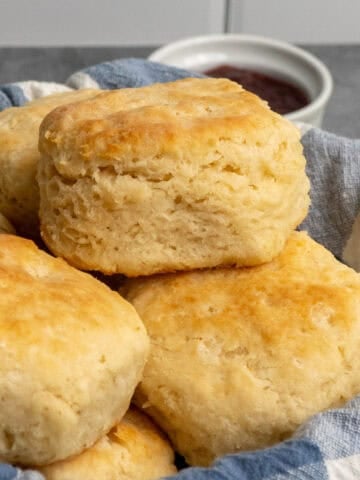
Garlic Knots are a family favorite in my house. The simple yeast dough is similar to pizza dough, but a little softer, fluffier, and sweeter. And these are so easy to make!

Jump to:
My kids go crazy over these easy garlic knots. They love helping make the dough and tie the knot shapes. We've brought these to game day parties as an appetizer served with this zesty pizza dip and they're a total hit.
They're also great for a weeknight dinner with easy chicken tetrazzini, beef lasagna, chicken and gravy, or chicken stroganoff. If you love this recipe, you'll want to try my sloppy joe garlic bread next!
Why You'll Love This Garlic Knots Recipe
- Beginner Friendly Recipe: This easy garlic roll recipe is straightforward and uses only 7 ingredients which you probably have at home already. Don't let tying the knots worry you, it's even easier than tying your shoes!
- Amazing Flavor: Brushing the garlic bread knots with melted butter and seasonings gives them a delicious flavor that pairs well with so many dishes, especially Italian flavors.
- Leftovers Freeze Well: It's unlikely you'll have leftovers because these are so good, but they do freeze beautifully if you want to make an extra batch.

Ingredients
- Granulated Sugar and Salt: These simple pantry staples are used to make the dough, giving it flavor.
- Active Dry Yeast: All you need is one tablespoon. I prefer active dry yeast over instant or rapid rise yeast for this recipe. Keep in mind if you switch to rapid rise the rise time will be shorter.
- All-Purpose Flour: All-purpose flour makes the knots soft and fluffy.
- Butter: Butter is used both for baking the dough and for the garlic butter that's brushed on after these are done baking. You'll need half a cup in total (so one full stick).
- Garlic Salt and Italian Seasoning: For the garlic butter topping.
See the recipe card below for exact ingredient amounts, nutritional information, and detailed instructions.
Variations
- Add Cheese: Mix in a little bit of finely grated Parmesan, Romano, or Asiago cheese into the dough if you want cheesy garlic knots. You could also sprinkle it on after baking.
- Add Fresh Herbs: In addition to Italian seasoning, you could sprinkle on fresh chopped herbs like oregano, rosemary, or thyme after brushing on the garlic butter.
- Dairy-Free: If you want to make it dairy-free, you can replace the butter with olive oil though you may want to increase the salt just a smidge.
How to Make Garlic Knots
Here's how to make these garlicky knots (it's easier than you might think!). Before starting, spray a glass bowl with cooking spray. This is where you'll set the dough when you let it rise.
- Step 1: Proof the Yeast. Add the active dry yeast, sugar, and salt to the warm water. Give it 5-10 minutes to set, until you see bubbles start to form at the top.
- Step 2: Mix the Dough. Pour the yeast mixture into your mixer bowl and slowly add small amounts of flour as it mixes. You can stop adding flour when the dough forms a ball on the bottom of the hook.
- Step 3: Let the Dough Rise. Transfer the dough to the prepared glass bowl, cover it in plastic wrap, and let it rise for 45-60 minutes, or until the dough has doubled in size.
- Step 4: Line a Baking Sheet. Cover your baking sheet with parchment paper, melt a ¼ cup of butter and evenly pour it over the baking sheet.
- Step 5: Roll and Tie the Knots. Roll small sections of dough, about ¾ inch thick and cut to 6-7 inches in length. Dust the dough with flour and tie into a knot, then place each knot on the buttered baking sheet.
- Step 6: Bake. Bake your knots in the preheated oven. Keep an eye on the knots for that perfect golden brown color, usually after baking about 18-20 minutes. Remove from the oven and let them cool for a few minutes. Make the melted butter mixture and gently brush it over the top of each knot.
Hint - Brush Them Twice!
If you want an extra golden brown color and even more flavor, brush the knots with the garlic butter before and after baking!

Expert Tips
- For the Perfect Rise: Make sure your yeast is fresh and add warm water, not hot.
- For Extra Garlic Flavor: Use minced garlic and saute it briefly with the melted butter before brushing it on.
- If You're Mixing by Hand: You can mix this dough by hand if you don't have a mixer. Just be sure to knead it really well! The dough should be smooth, elastic, and spring back when you poke it. When kneading by hand, you may need a little less flour than if you're using the standing mixer.
- Tying the Knots: You can tuck the ends underneath or leave them out, it's up to you.
Storage Directions
- Storing: Leftovers keep in an airtight container in the refrigerator for up to 3 days, but they're best served fresh, if you ask me!
- Freezing: To freeze after they've been baked, let the knots cool completely before placing them in a freezer safe bag. They keep for up to 2 months in the freezer. To thaw, let them thaw at room temperature.
- Reheating: For best results, wrap your leftovers in foil and heat in a 350° F oven for 5 minutes to reheat. You can also use the microwave, but I find this often makes them too chewy.

Serving Suggestions
Homemade garlic knots are great with so many things! They can be served as a party appetizer with marinara dipping sauce or ranch, or as the perfect side for a weeknight dinner.
- Italian dishes pair wonderfully with these. Serve them with this cheesy ravioli bake, stuffed zucchini recipe, sheet pan chicken and sweet potatoes, or creamy sausage pasta.
- You could also make a quick and easy family dinner or potluck with Italian pizza bread, cucumber salad with tomatoes, a classic pasta salad, and these yummy knots.
- Have them for lunch with a bowl of easy lasagna soup, vegetable beef soup, or spinach tortellini soup. So good!
- Sometimes I even pack these for a picnic along with charcuterie items or add them to my kids' lunches as a special surprise.
Recipe FAQs
Yes, you can! o do this, make the knots like you normally would. Cover the baking pan with plastic wrap and flash freeze the knots for 1-2 hours in the freezer, then move them into a freezer safe Ziploc bag. They'll keep for up to 3 months. To bake, remove them from the freezer and line them on a baking sheet with parchment paper and butter, like it says in the recipe. Allow them to thaw and rise at room temperature for about 2 hours, then bake.
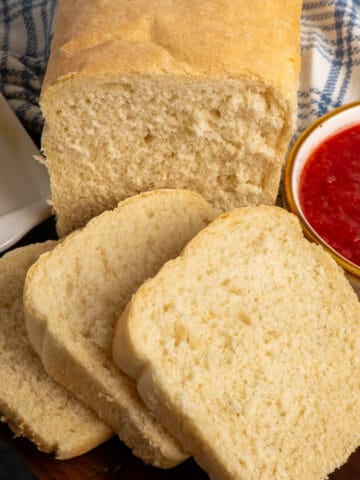
Yes, you could use store-bought or homemade pizza dough to make homemade knots. I personally like these made from scratch since they're a little fluffier than traditional pizza dough.
If the dough keeps springing back or is really hard to roll out, let it rest for another 15 minutes.

More Delicious Bread Recipes

We would love it if you would leave a 5 Star ⭐️⭐️⭐️⭐️⭐️ rating below. Then follow me on Facebook, Instagram, and Pinterest! Share your favorite recipes or ask questions in my Facebook Group.

Garlic Knots
Ingredients
- 1 ½ cup warm water
- 2 tbsp granulated sugar
- 1 tsp salt
- 1 tbsp active dry yeast
- 3-3 ½ cups all-purpose flour
- ¼ cup butter melted
Garlic Butter
- ¼ cup butter melted
- 1 tsp garlic salt
- 1 tsp Italian seasoning
Instructions
- Lightly spray a glass bowl with cooking spray and set aside.
- Add yeast, sugar, and salt to warm water. Let the mixture set for 5-10 minutes or until the top of the mixture forms bubbles.
- Pour the mixture into the bowl of your mixer. Slowly add in small amounts of flour at a time and mix using the hook attachment.
- Once the dough forms a ball on the bottom of the hook and most of the dough is removed from the sides of the bowl, stop adding flour. Add the dough to the prepared glass bowl, cover with plastic wrap, and set aside. Let the dough rise for 45 mins. To an hour or until the dough has doubled in size.
- Line a baking sheet with parchment paper. Melt ¼ cup of butter and evenly pour it on the baking sheet. Set aside.
- Lightly flour a flat, clean section of your countertop. Roll a small section of dough until it is about ¾ of an inch thick. Cut it between 6 and 7 inches in length. Dust the dough with a tiny bit of flour and tie it in a knot. Place the knot on the buttered baking sheet. Continue with this step until all the dough has been used.
- Bake the knots for 18-20 minutes, or until they are slightly golden brown. Remove the baking sheet from the oven and cool for a few minutes.
- Melt ¼ cup of butter and mix in garlic salt and Italian seasoning. Gently brush the knot with the butter mixture, serve, and enjoy!
Notes
- For the Perfect Rise: Make sure your yeast is fresh and add warm water, not hot.
- For Extra Garlic Flavor: Use minced garlic and saute it briefly with the melted butter before brushing it on.
- If You're Mixing by Hand: You can mix this dough by hand if you don't have a mixer. Just be sure to knead it really well! The dough should be smooth, elastic, and spring back when you poke it. When kneading by hand, you may need a little less flour than if you're using the standing mixer.
- Tying the Knots: You can tuck the ends underneath or leave them out, it's up to you.
Nutrition
*All nutrition information provided is automatically calculated and is an estimate and will vary based on ingredients, brands, and changes in cooking methods listed in the recipe. If you need exact numbers on your ingredients, I would recommend calculating them with your prefered nutrition calculator.


Ryan Allen
These garlic knots are the perfect addition to any dinner.