Cherry Bars are the ultimate easy dessert for any occasion, whether you're baking for a crowd or just prepping a sweet treat for the week. This recipe pairs a buttery, soft vanilla-infused crust with sweet cherry pie filling and a light drizzle of powdered sugar glaze. It's everything you love about cherry pie-only in bar form!

Jump to:
You only need basic pantry staples, such as butter, flour, eggs, and sugar, to bring these easy cherry bars to life. Just layer, bake, drizzle, and you're done! These dessert bars are fuss-free, beginner-friendly, and wont last long! They're perfect for potlucks, holidays, or when you're craving something sweet without putting in much effort.
If you like these Cherry Bars and are looking for some other dessert bar recipes for a crowd, try our O'Henry Bars, Oatmeal Chocolate Chip Bars, or Chocolate Chip Cookie Cheesecake Bars.
Why You'll Love This Recipe
- Simple Pantry Staples: Made with everyday baking ingredients, you will likely have everything on hand.
- Quick to Prep: From mixing to baking, these cherry dessert bars come together in under an hour.
- Classic Cherry Pie Flavor: All the nostalgic flavor of cherry pie without the rolling pin!
- Perfect for a Crowd: Great for potlucks, parties, or anytime you need a dessert that serves a group.
- Kid-Approved: Sweet, fruity, and topped with glaze-these bars are always a hit with kids (and adults!).

Ingredients
- Butter: Use unsalted butter at room temperature for the best texture and flavor. Room-temperature butter blends easily into the sugar, creating a light and fluffy base for the bars.
- Granulated Sugar: This provides sweetness and helps create that soft, slightly crisp texture in the crust. Use regular white granulated sugar for consistent results.
- Eggs: Use large eggs and bring them to room temperature before baking. This helps them incorporate smoothly into the batter and gives your cherry pie bars a better rise.
- Vanilla Extract: Pure vanilla extract is recommended for the best flavor. It adds warmth and enhances the overall sweetness of the cherry filling and glaze.
- All-Purpose Flour: Standard all-purpose flour works great here, giving structure to the bars. Be sure to spoon and level your flour for accurate measurement, too much can make the bars dry.
- Salt & Baking Powder: These dry ingredients help balance the sweetness and provide a little lift to the batter. They're essential for the texture, so don't skip them.
- Cherry Pie Filling: Choose your favorite canned cherry pie filling, regular or premium. Look for one with plump, whole cherries and a thick, glossy sauce. You'll need one standard 21-ounce can.
- Powdered Sugar, Milk, and Vanilla: This simple three-ingredient glaze adds a sweet finishing touch. Use powdered sugar for a smooth texture, add a splash of milk to thin it out, and a hint of vanilla extract to tie the flavors together. Mix until lump-free, and drizzle once the bars are fully cooled.
See the recipe card below for exact ingredient amounts, nutritional information, and detailed instructions.
Variations
- Switch Up the Pie Filling: Not a cherry fan? Use blueberry, raspberry, peach, or apple pie filling for a fresh twist on this classic bar. Any canned pie filling works here!
- Add a Lemon Glaze: Replace the milk in the glaze with fresh lemon juice to create a bright, citrusy contrast to the sweet cherry filling.
- Make Your Own Fruit Filling: Want to go homemade? Simmer fresh or frozen cherries with a bit of sugar and cornstarch to create your own pie-style filling from scratch.
- Try a Different Drizzle: Skip the vanilla glaze and drizzle with melted white chocolate or a thin cream cheese glaze for an indulgent topping.
- Gluten-Free Option: Use a cup-for-cup gluten-free flour blend in place of all-purpose flour. Just be sure to double-check that your pie filling is gluten-free too!
How To Make Cherry Bars
This cherry bars recipe come together quickly with simple ingredients and a few easy steps. Start by preheating your oven to 350°F and greasing a 9x13-inch baking pan so it's ready to go.

- Step 1: Cream the Butter and Sugar. Cream the softened butter and granulated sugar together in a mixing bowl until the mixture looks fluffy and pale. This step is key for a soft, light texture.

- Step 2: Add the Eggs and Vanilla. Mix in the vanilla extract, then beat in the eggs one at a time. This keeps the batter smooth and helps everything combine evenly.

- Step 3: Mix in the Dry Ingredients. Whisk together the flour, baking powder, and salt in a separate bowl. Slowly add the dry ingredients to the wet mixture, stirring until just combined to avoid overmixing.

- Step 4: Layer the Batter and Filling. Spread about two-thirds of the batter into the bottom of your prepared pan. Gently spoon the cherry pie filling over the batter, then drop small spoonfuls of the remaining batter on top, you don't need to cover it completely.

- Step 5: Bake the Bars. Bake for 25-30 minutes, or until the top is just starting to turn golden. Let the bars cool in the pan before adding the glaze.

- Step 6: Step 6: Add the Glaze. Whisk together powdered sugar, milk, and vanilla until smooth. Drizzle it over the cooled bars, using a spoon or a plastic bag with the corner snipped off for easy drizzling.
Hint: Don't Cover It All Up
Drop spoonfuls of the remaining dough over the cherry filling rather than spreading it. Leaving some of the filling exposed adds to the classic bar look.

Expert Tips
- Softened Butter & Room Temperature Eggs: For a smooth batter and a tender crust, make sure your butter is fully softened and your eggs are at room temperature. This helps create a uniform texture.
- Sift Dry Ingredients: Sifting the flour, baking powder, and salt ensures there are no lumps and makes it easier to incorporate everything into the wet ingredients.
- Don't Overmix the Batter: Mix the ingredients just until everything is incorporated. Overmixing can lead to a dense texture, so keep it gentle for light and airy bars.
- Let the Bars Cool Before Glazing and Cutting: Allow the bars to cool a bit before drizzling the glaze on top. This ensures the glaze will set properly, rather than melting into the bars.
Storage Directions
- Storing: Leftovers can be kept in an airtight container in the refrigerator for up to 5 days. For longer storage, wrap the bars tightly in plastic wrap or foil and freeze for up to 3 months. Be sure to use a freezer-safe container or a heavy-duty freezer bag to keep them fresh.
- Reheating: To reheat, place the bars in the microwave on medium heat for 20-30 second intervals until warm.
Serving Suggestions
These cherry squares are versatile and perfect for a variety of occasions. Whether you're serving them as a sweet treat at a family gathering or after a hearty meal, they're sure to be a crowd-pleaser. Here are some great ideas for serving them:
- Create a fun dessert spread for the holidays or any gathering with a variety of treats, such as orange rolls, macadamia nut cookies, and pecan pie bars.
- Make them for family dinners or potlucks, these bars are easy to transport and always a hit! Serve them with hearty meals like beef stroganoff or chicken stuffing casserole.
- Pair them with a cup of coffee or tea. Cherry bars make a delicious dessert alongside your favorite hot beverages, especially for brunch or afternoon tea.

Recipe FAQs
Yes, you can make your own cherry filling by cooking fresh cherries with sugar, cornstarch, and a little lemon juice to thicken it. This will give you a fresh twist on the classic cherry pie filling.
Yes, you can prepare these bars a day or two in advance and store them in an airtight container in the refrigerator.. They'll hold their flavor and texture well, making them a great make-ahead dessert for parties.
Yes, you can freeze the bars for up to 3 months. Wrap them tightly in plastic wrap and store in a freezer-safe container. Let them thaw in the refrigerator overnight before serving.
To reduce the sweetness, you can reduce the sugar in both the bars and the glaze. You could also use a sugar-free cherry pie filling if you prefer.
Cherry bars may fall apart if they are not fully cooled before cutting. Allow the bars to cool completely before slicing to ensure they hold their shape. Also, if the dough was too thin or not properly spread, it can affect the structure. Make sure to evenly distribute the batter, leaving a little space for the cherry filling, and check the baking time to ensure the bars are fully set.
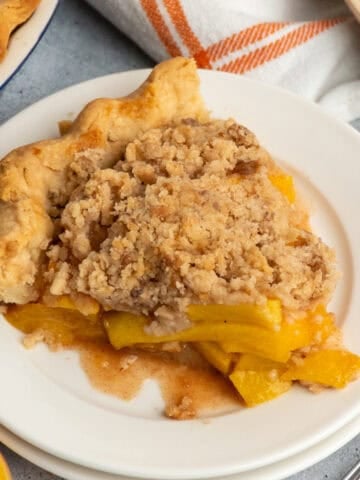
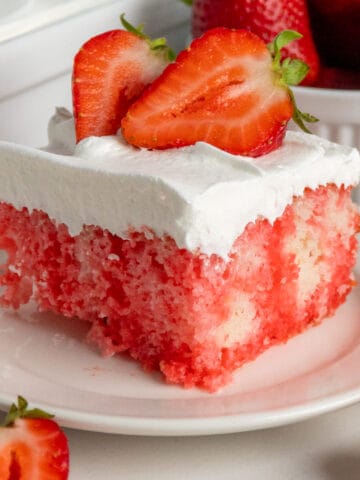
More Delicious Dessert Recipes with Fruit


We would love it if you would leave a 5 Star ⭐️⭐️⭐️⭐️⭐️ rating below. Then follow me on Facebook, Instagram, and Pinterest! Share your favorite recipes or ask questions in my Facebook Group.

Cherry Bars
Ingredients
- 1 cup butter room temperature
- 1 ¾ cup granulated sugar
- 4 large eggs
- 2 teaspoons vanilla extract
- 3 cups all-purpose flour
- ¼ teaspoon salt
- 1 ½ teaspoons baking powder
- 1 can cherry pie filling
Glaze
- 1 cup powdered sugar
- 3 tablespoons milk
- 1 teaspoon vanilla extract
Instructions
- Preheat oven to 350℉. Spray non-stick cooking spray in a 9x13 pan and set aside.
- Cream together butter and granulated sugar using either a hand mixer, or a stand mixer.
- Slowly add vanilla extract and one egg at a time. Cream together until light and fluffy.
- Then, sift flour, baking powder, and salt, and gradually mix into the egg mixture.
- Spread ⅔ of the batter into the bottom of the prepared baking dish. Next, gently spread the cherry pie filling on top. Scoop the remaining batter on top of the cherries. (Do not cover the cherries completely)
- Bake for 25-30 minutes or until the dough starts to turn a slight golden brown color. Remove from the oven and cool.
- Using a wire whisk mix together powdered sugar, vanilla extract, and milk in a medium bowl. Mix until there are no lumps.
- Once the Bars are cool, drizzle the glaze on top of them. I did this by pouring the glaze into a Ziploc bag and cutting a small hole in the corner.
- Serve and enjoy!
Notes
- For the best texture, ensure your butter is softened, and your eggs are at room temperature before mixing.
- Feel free to switch up the cherry pie filling with your favorite fruit filling for a unique twist on these bars.
- Once cooled, drizzle the glaze over the bars using a Ziploc bag with the corner snipped off for a neat, even drizzle.
- Allow the cherry bars to cool completely before cutting to help them set and hold their shape better.
Nutrition
*All nutrition information provided is automatically calculated and is an estimate and will vary based on ingredients, brands, and changes in cooking methods listed in the recipe. If you need exact numbers on your ingredients, I would recommend calculating them with your prefered nutrition calculator.
Ryan Allen
They yummy bars are one of my new favorite treats.